|
|
|
Technical guidance > Recording a presentation
SOLUTIONS FOR RECORDING A COMMENTED SCREEN PRESENTATION
You will find, by clicking links, a presentation template for your communications in Microsoft Powerpoint or LibreOffice format. We suggest you to use it in order to keep a certain visual coherence to all the communications.
A – If you made your presentation with Microsoft Powerpoint©, you can save the commentary directly in the software and export it as a video.
- You can record a comment on each slide by following the detailed instructions in this link (please select the MAC or PC tab).
- Then, export your presentation in video (please select your version in the tabs); this link can help you.
Choose to export your PPT in MP4 or H264 format, MAXIMUM presentation quality (1920 x 1080p).
B – If you have made your presentation with Libreoffice or other software or if you wish to record your presentation by commenting on it live on your screen, several solutions are available:
B.1. Direct recording on Mac
If you have a Mac, the solution is simple, you can use the Apple's tool: https://support.apple.com/fr-fr/HT208721#mojave
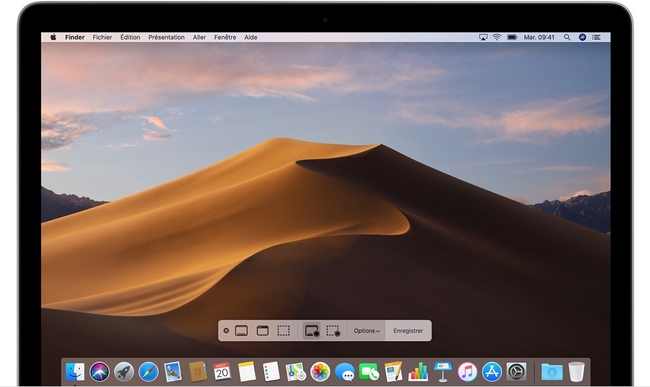
From MacOS Mojave (10.14), press Shift + Command (⌘) + 5 on your keyboard to display all the commands you need to record video and capture still images of your screen.
Recording the entire screen:
- Click
 in the on-screen commands. Your mouse pointer takes the form of a camera
  .
. - Click on a screen to start saving the screen in question or click on Save in the on-screen controls.
Recording on-screen activities on the computer:
Switch to the window of your presentation, put it in full screen, make your presentation live by speaking clearly and loudly, as if you were in front of your audience (we advise you to use a microphone).
- Trim, share, save or perform other actions using the thumbnail at the bottom right of the screen: https://support.apple.com/fr-fr/HT208721#thumbnail
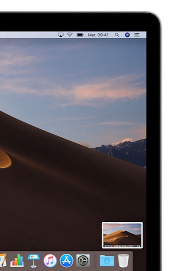
When recording is stopped, a thumbnail of the movie is briefly displayed in the lower right corner of the screen.
- You can choose to do nothing or scan to the right on the thumbnail so that the recording is automatically saved.
- Click on the thumbnail to open the recording. You can then click on
 to trim the record or on
  .
. - Drag the thumbnail to move the record to another location, for example to a document, an e-mail, a Finder window, or the computer trash.
- Click on the thumbnail while holding down the Control ctrl key to display additional options. For example, you can change the location where the video is saved, open the video in an application, or delete it without saving it.
B.2. With QuickTime (for Mac and PC)
QuickTime is video player and editing software available for Mac and PC.
With a Mac: QuickTime Player also has a screen recording feature.
- Open QuickTime Player from your Applications folder, then choose File > New Screen Save from the menu bar. The Screen Recording window appears.
- Before starting your recording, you can click on the arrow next to
 to change the recording settings:
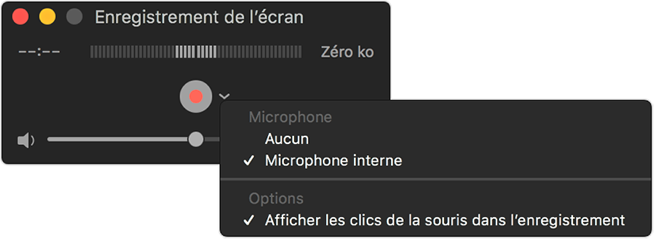
• To record your voice or other sound with the screen recording, select a microphone. To monitor this sound during recording, adjust the volume using the slider (if you hear audio feedback, lower the volume or use a headset with a microphone).
• If you want a black circle to appear when you click, choose Show Mouse Clicks in Registration. - To start recording, click on
 , then perform one of the actions below:
• Click anywhere on the screen to start recording the entire screen.
• Drag the pointer to select an area to record, and then click the Start Recording button that appears in that area.
Recording on-screen activities on the computer:
Switch to the window of your presentation, put it in full screen, make your presentation live by speaking clearly and loudly, as if you were in front of your audience (we advise you to use a microphone).
- To pause recording, click
 in the menu bar or press Command + Control + Esc
. - Once your recording is complete, it will automatically appear in QuickTime Player. You can now play, edit or share the recording.
With a PC: Download and install the latest version of QuickTime Recorder. Click Video Recorder to choose full screen recording.

Choose the audio recording channel.
Select Audio Recorder to record the system sound, the microphone, or both audio channels (if possible, we recommend using an external microphone).

After that, you can click the REC button to save the screen and audio files to your computer.
Recording on-screen activities on the computer:
Switch to the window of your presentation, put it in full screen, make your presentation live by speaking clearly and loudly, as if you were in front of your audience (we advise you to use a microphone).
At the end of your presentation, click Stop, option after the recording process to save the video file to your computer.
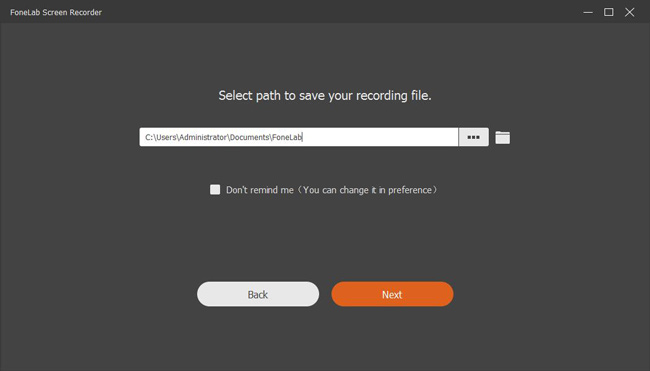
Note: when you need to adjust the video format or quality, you can go to Preferences, select the video format, video codec, video quality, frame rate, audio format and audio quality.
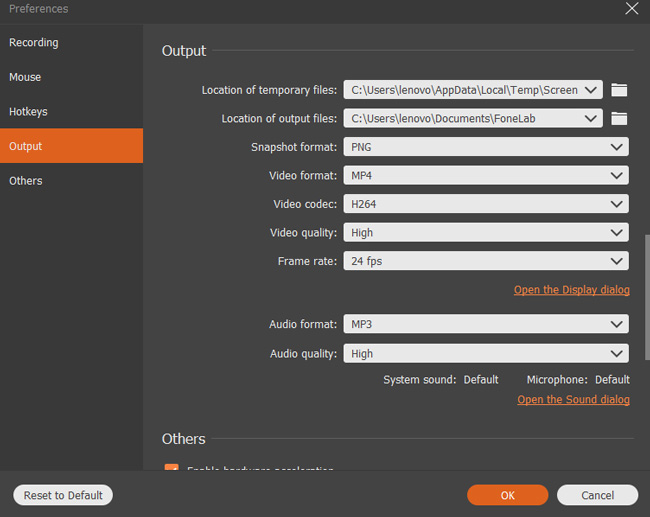
Choose to record your video in MP4 / H264 / Hight quality
B.3. With OBS (for MAC and PC)
- Download the software: https://obsproject.com/fr/
- Open the software
- Set up the software
Either go to OBS > Preferences or click Settings at the bottom right of the screen.
In the Settings window, click on Output and set the parameters as shown below (be sure to choose the location where your file will be saved so that you can find it easily):
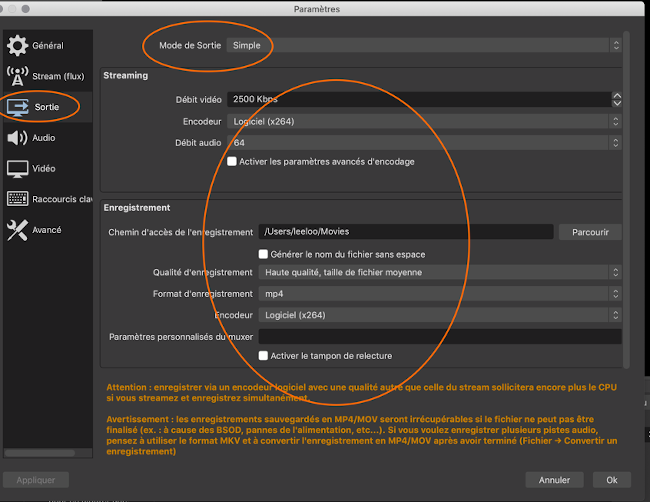
Close the Settings window
- Then you can save your presentation:
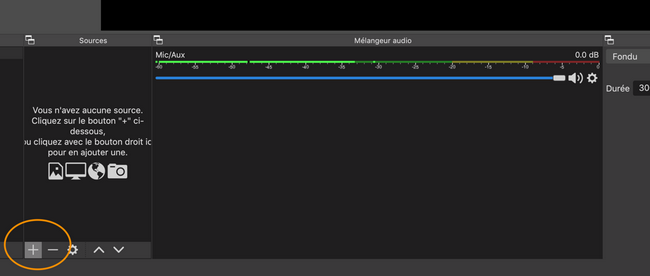
Click + in the Sources window
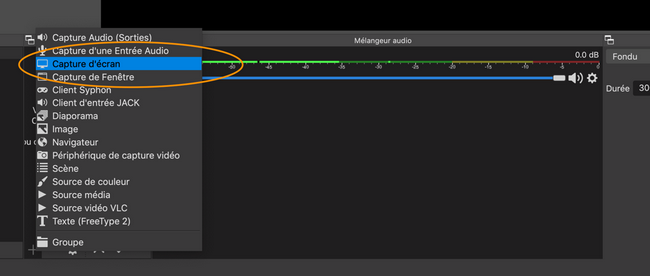
Select Screenshot
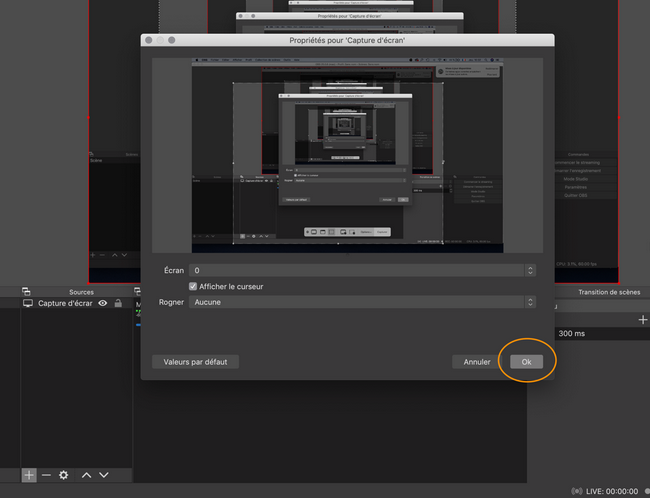
Validate
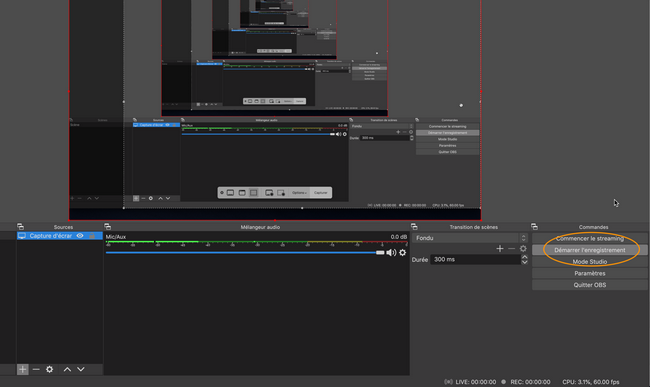
Start recording.
Recording on-screen activities on the computer:
Switch to the window of your presentation, put it in full screen, make your presentation live by speaking clearly and loudly, as if you were in front of your audience (we advise you to use a microphone).
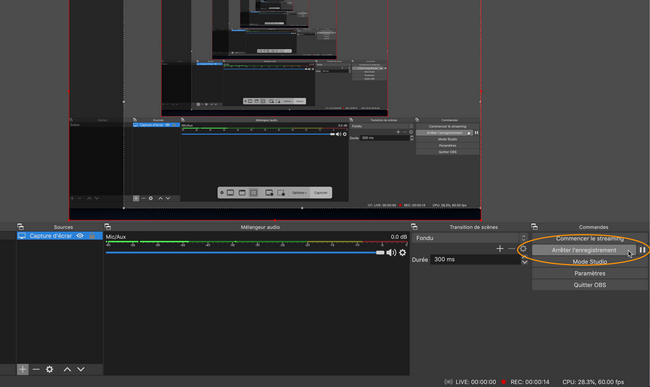
At the end of your presentation, switch to OBS and Stop Recording.
B.4. With Zoom (for Mac and PC)
-
Install Zoom
-
Create a new meeting without guests
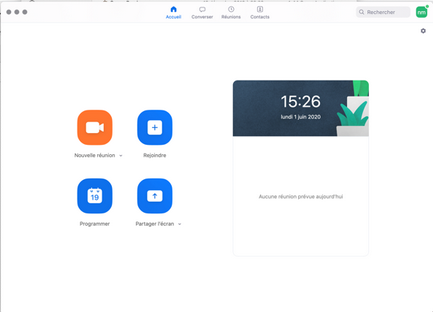
-
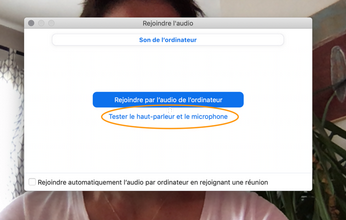
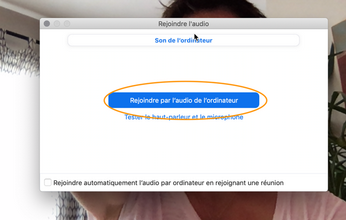
Check and set up the microphone
-
Open the .ppt, .odt or other presentation file
-
Go back to Zoom
-
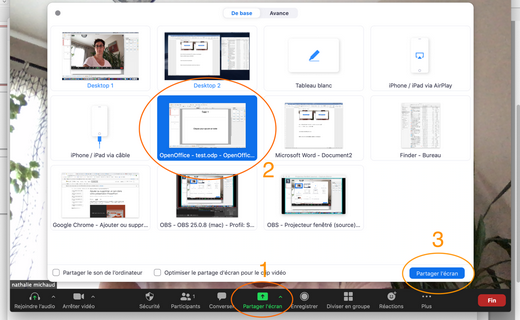
Click
Share -
Choose your presentation document
-
Click
Share screen
-
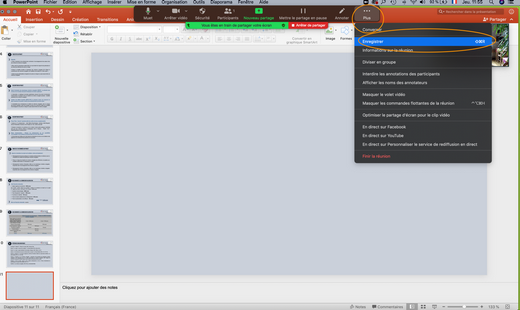
Then, click
Recording
Recording on-screen activities on the computer:
Switch to the window of your presentation, put it in full screen, make your presentation live by speaking clearly and loudly, as if you were in front of your audience (we advise you to use a microphone).
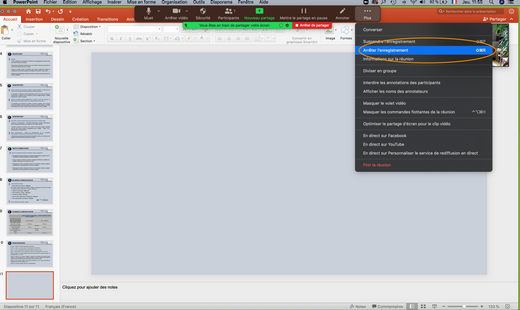
- At the end of your presentation, click
Stop recording.


